6th Apostle, Delezie of Plague Raid
The [6th Apostle, Delezie of Plague Raid] content will be added.
The [Delezie Raid] channel will be added.
- You can enter it after completing the Level 115 Act quest, "Faint, Remaining Ray of Light."
- Solo/Matching: [Delezie: First Act]
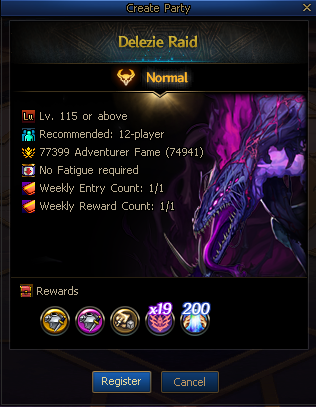
- Normal: [Delezie: Last Act]
The new [6th Apostle, Delezie of Plague Raid] Scenario quests will be added.
- You can unlock it by accepting the Level 115 Act quest, "After Dawn Breaks."
The [6th Apostle, Delezie of Plague Raid] is accessible on Thursday, Friday, Saturday, Sunday and Monday.
The [6th Apostle, Delezie of Plague Raid] will be open temporarily after maintenance on Tuesday, April 21, and until 09:00 UTC on Wednesday, April 22.
Content Info
|
Category
|
Content
|
|
Channel
|
[Delezie: First Act]
|
[Delezie: Last Act]
|
|
Difficulty
|
Solo
|
Matching
|
Normal
|
|
Entry Level
|
115
|
|
Recommended Party Size
|
1 person
|
12 people
|
12 people
|
|
Character Bind
|
X
|
X
|
X
|
|
Entry Fame
|
63,257
|
|
Recommended Fame
|
63,257
|
63,257
|
77,399
|
|
Entry Fatigue Cost
|
X
|
|
Weekly Entry Limit
|
X
|
X
|
1 time
Your Weekly Entry count will be decreased at the beginning of the content.
If you fail or abandon the Raid, your Weekly Entry count will be restored.
|
|
Weekly Reward Count
|
1 time
All 3 difficulty modes share the Reward count.
Your Weekly Reward count will be decreased when you receive a reward.
You can't enter the content if you have 0 Weekly Reward count left.
Clear at least 2 dungeons to receive a reward.
Clear counts are recorded for each individual party member.
If the conditions are not met, rewards cannot be obtained and both the Weekly Reward count/Weekly Entry count will be decreased.
You can get the Weekly reward upon defeating the final Boss within the time limit.
Your Weekly Reward count will be decreased when you receive a reward.
Your Weekly Entry limit and Weekly Reward count will be reset weekly on Tuesday at 09:00 UTC.
|
Content Entry
You can enter the [Delezie Raid] after completing the quest, "Faint, Remaining Ray of Light."
- The [Delezie Raid] channel requires 63,257 or higher Fame to enter.
You can create a Raid Group through NPC Third Adjutant Farrier Calceo in the [Delezie Raid] channel.
- You can create a Raid Group through NPC Third Adjutant Farrier Calceo or the Create Raid Group button in the Find Raid Group UI.
After creating or joining a Raid Group, move to the right side and start the content through NPC Third Adjutant Farrier Calceo.
Content Rules
Content Failure
The Raid fails when the Malefic Energy Gauge reaches 100%.
If you fail, your Weekly Entry count will be restored.
Restrictions
Life Token use is limited.
- The Life Token count is shared among the Raid Group members.
- When the Raid starts, a total of 10 Life Token uses will be made available, and 1 Life Token will be consumed per resurrection.
- On Solo/Matching mode, no Life Tokens can be used; death will result in automatic resurrection.
Healing Consumable use is limited.
- Consumable use count is applied on an individual basis.
- 7 Consumable uses will be made available at the start of the Raid.
- Puppet Consumable use is limited.
During the content, clearing a certain dungeon will grant 1 Life Token and 2 Consumable uses for all Raid Group members.
- Phase 1: Upon defeating the Malefic Bomb Transporter
- Phase 2: Upon defeating the Plague Seed
Area Buff
The Area buff, "Time of Reckoning," will be added.
The Time of Reckoning buff will be applied to the Delezie Raid channel.
It increases STR and INT upon entering dungeons.
Start Raid
HP Ratio Settings
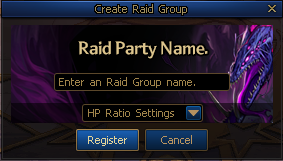
When creating a Delezie Raid party, you can set the HP Ratio of monsters.
You can set a minimum of 0% and a maximum of 500% in 50% increments.
When set, the monsters' HP will be increased by that percentage.
Preparing for Battle
After all members have entered the Azure Main area, the Raid Group Commander can vote on whether or not they're ready for battle by using the NPC [Third Adjutant Farrier Calceo]'s Start Raid menu.
Once all personnel are ready, the Raid will begin.
In the Ready for Delezie Raid Combat UI, you can see the Avatars of other Raid Group members and their party colors.
Common Systems
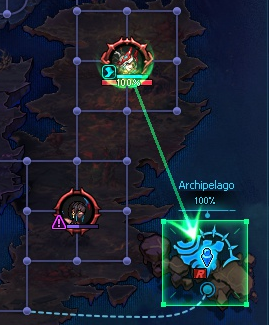
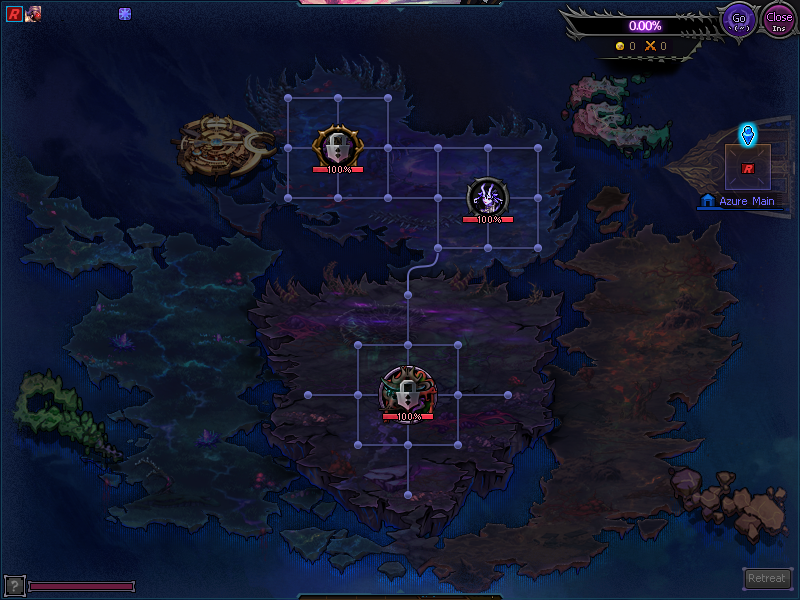
Islands

The Crimson Mine Village, Archipelago, Sanctuary of Stars, and Inae islands are located in Sunken Depths.
Destroying an island increases the Malefic Energy Gauge.
Summoning the Saint Horn

The party leader can use the Raid Special Key button ( ` ) to move to the desired location.
- It has a 6-sec. cooldown.
All party members will be moved together when it's used.
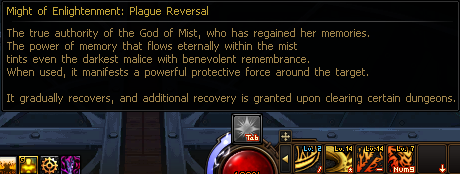
Might of Enlightenment: Plague Reversal
 `
`
When the Plague Reversal Gauge is full, you can use it with the Dungeon Special Key (Tab).
The Plague Reversal Gauge can be further restored by clearing certain dungeons.
- Upon defeating the Malefic Bomb Transporter
- Upon clearing the Plague Zone
- Upon defeating Delezie and the Twisted Malices
Plague Reversal can be maintained up to 3 seconds by pressing and holding down the Dungeon Special Key.
You can activate it by releasing the Dungeon Special Key whenever you want.
The effect will be more powerful when a monster's eyes glow red.
At the start of the content, 3 random Raid Group members will start with their Plague Reversal Gauge fully restored.
Hitting a monster with Plague Reversal while it's Groggy increases its damage by 25% for 10 sec., and this effect can be stacked.
Monster AI
Certain monsters move to a different area, depending on the situation.
Ambush
When a monster moves and a player is present at its next location, the Ambush effect is triggered.
This effect grants Groggy Time upon entering combat and resets all cooldown except for Awakening skills.
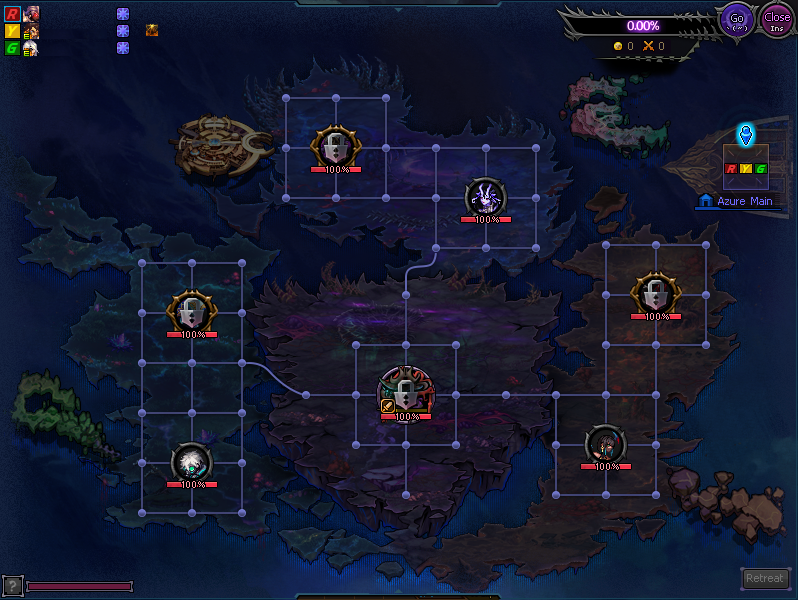
Phase 1 - Maneuver
Configuration
Consists of area-specific Maleficent Troops, 3 Named monsters, and 4 of the Five Maleficents of Tribulation.
| |
Meadow of Doubt
|
Crescent Moon Lake
|
Forsaken Desert
|
Vengeful Fortress
|
|
Named
|
Specimen Eled
|
Whispering Ladina
|
Overseer Verde
|
-
|
|
Five Maleficents of Tribulation
|
Prime Distrust, Largo
|
Mad Destruction, Mahnarval
|
Twisted Desire, Rubra
|
Salgeifer the Heartless
|
Phase 1 is cleared upon defeating the final boss, Salgeifer the Heartless.
Hem of Mist

You can restore your Hem of Mist Gauge by defeating Named monsters and the Five Maleficents of Tribulation.
Once your Hem of Mist Gauge is full, you'll gain a powerful buff from the God of Mist.
- Overall Damage +30% during Phase 1 - Maneuver
Maleficent Troops

Defeating Maleficent Troops that spawn in a field will summon one of the Five Maleficents of Tribulation associated with that area.
Malefic Bomb Transporter

The Malefic Bomb Transporter spawns in front of an Island. If it's not defeated for a certain amount of time, it will decrease the Island's HP and increase the Malefic Energy Gauge.
Defeating the Malefic Bomb Transporter restores Plague Reversal Gauge for all Raid Group members.
Defeating the Malefic Bomb Transporter grants 1 Life Token and 2 Consumable uses for all Raid Group members.
Named Monsters

Increase Malefic Energy Gauge if not defeated for a certain amount of time.
One of the Named will randomly spawn in a strengthened state.
- Increased HP
- Significantly increases Malefic Energy Gauge if not defeated for a certain amount of time.
Defeating a Named monster increases the damage taken by the Maleficent of Tribulation in the same area.
| |
Meadow of Doubt
|
Crescent Moon Lake
|
Forsaken Desert
|
|
Named
|
Specimen Eled
|
Whispering Ladina
|
Overseer Verde
|
|
Five Maleficents of Tribulation
|
Prime Distrust, Largo
|
Mad Destruction, Mahnarval
|
Twisted Desire, Rubra
|
|
Effects
|
Incoming damage +50%
|
Five Maleficents of Tribulation

The Maleficents of Tribulation, except for Salgeifer, will move to an empty island after a while.
If a Maleficent of Tribulation stays on an island, the island's HP will gradually decrease.
If a Maleficent of Tribulation is on a destroyed island, it continuously increases the Malefic Energy Gauge.
Defeating a Maleficent of Tribulation increases the damage taken by Salgeifer the Heartless by 30%. (Up to +90%)
Salgeifer the Heartless

Periodically spawns Maleficent Troops and Malefic Bomb Transporters on the field.
Gradually recovers HP if not engaged in combat for a certain amount of time.
Summons new Maleficent Troops when the Hem of Mist buff is activated.
- Defeating these new Maleficent Troops decreases Salgeifer's HP.
- Defeating these new Maleficent Troops increases all Raid Group members' Atk. and all speed.
Phase 2 - Ultimatum
Upon entering Phase 2 - Ultimatum, 25% of Malefic Energy Gauge is restored per remaining island.
Upon entering Phase 2 - Ultimatum, the HP of islands that have not been destroyed will be restored by 50%.
Cooldown will be reset upon entering Phase 2.
Plague Reversal will be fully restored upon entering Phase 2.
Configuration
Consists of Hosdig of Folly, an area-specific Twisted Malice, and Delezie of Plague.
| |
Meadow of Doubt
|
Crescent Moon Lake
|
Forsaken Desert
|
Vengeful Fortress
|
|
Five Maleficents of Tribulation
|
-
|
-
|
-
|
Hosdig of Folly
|
|
Twisted Malice
|
Twisted Malice: Demise
|
Twisted Malice: Wailing
|
Twisted Malice: Calamity
|
-
|
|
Delezie
|
-
|
-
|
-
|
Delezie of Plague
|
Defeating the One Who Sheds Tainted Blood, the final form of Delezie, will clear the content.
Plague
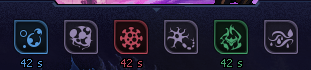
In the Ultimatum phase, 6 different types of Plague are available, with 1 type assigned to each Twisted Malice.
The following Plague effects occur on the Plague Zones and Plague Seeds created by the Twisted Malices.
| |
Scattering Spores
|
Repressed Plague
|
Rampant Virus
|
Nervous System Activator
|
Dense Toxins
|
Mutant Creation
|
|
Effects
|
Plague Zone Creation count +100%
|
Plague Zone Normal monster HP +50%
|
Increases Twisted Malices' damage reduction from Plague Zones.
|
Twisted Malice Atk. +50%
|
Summons additional Normal monsters upon entering a Plague Zone.
|
Continuously decreases HP upon entering a Plague Zone.
|
Defeating a Twisted Malice will remove the Plague Zone it created.
Defeating a Twisted Malice grants each remaining Malice 1 additional Plague type that has not yet been activated.
Plague Zone
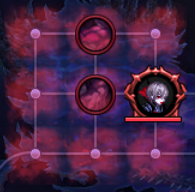
The Twisted Malices periodically create Plague Zones nearby.
Depending on the number of Plague Zones, the Malefic Energy Gauge will periodically increase.
A Plague Zone contaminates the surrounding 3x3 area.
- The contaminated area has the same effect as having a Plague Zone present.
If the entrance to an island becomes contaminated due to a Plague Zone, the island's HP will gradually decrease.
Destroying a Plague Zone removes the contamination from the nearby 3x3 area.
Destroying a Plague Zone restores the Plague Reversal Gauge.
Twisted Malice

Periodically creates Plague Zones in nearby vacant areas.
- Plague Zone creation can be strengthened through the Plague effect.
Monsters receive a strengthening effect based on the number of Plague Zones spread.
The Malefic Energy Gauge periodically increases based on the number of Plague Zones placed on the field.
Twisted Malices remove all their Plague Zones upon death, and then move to the Malefic Cradle to enter Recovery mode.
Upon completing Recovery Mode, they respawn in their own zone with 50% HP restored.
Twisted Malices gradually recover HP if not engaged in combat for a certain amount of time.
Hosdig of Folly

When Hosdig moves to where a Twisted Malice is, they clash.
- A Twisted Malice doesn't create a Plague Zone while clashing.
- At the end of the clash, the damage taken by the Twisted Malice involved increases. (Max Stacks: 3)
Plague Seed

Plague Seeds spawn on the field under specific conditions.
Defeating a Plague Seed grants 1 Life Token and 2 Consumable uses for all Raid Group members.
Defeating a Plague Seed causes a non-engaged Hosdig and the Twisted Malice of the area to move to the destroyed seed's location.
- The Twisted Malice will move after 15 sec.
- Hosdig will move in 30 sec.
- If Hosdig is in the middle of a clash or if the player at the destination is in combat, it won't move.
Delezie of Plague

Gradually recovers HP if not engaged in combat for a certain amount of time.
Increases the Malefic Energy Gauge if not engaged in combat for a certain amount of time.
Delezie will move to the Malefic Cradle upon death and enter Recovery mode.
If you retreat during battle with the One Who Sheds Tainted Blood, the monster will instantly recover 20% of HP.
If the One Who Sheds Tainted Blood's HP drops below 50% and Hosdig is alive, it will devour Hosdig.
- By devouring Hosdig, it will recover a portion of Hosdig's remaining HP.
Plague Zones created by the One Who Sheds Tainted Blood restore 20% of Plague Reversal Gauge when destroyed.
Fusion
When a Twisted Malice and Delezie move to the Malefic Cradle at the same time to recover HP, they'll fuse and transform into a new entity.
- The new entity will respawn after a while.
- While fused, if Delezie defeats another Twisted Malice, the defeated Malice will be destroyed and fusion will be completed immediately.
When two Twisted Malices move to the Malefic Cradle at the same time to recover HP, the two Twisted Malices will respawn instantly.
If no more monsters are available for fusion, the One Who Sheds Tainted Blood will appear.
Hall of Valor
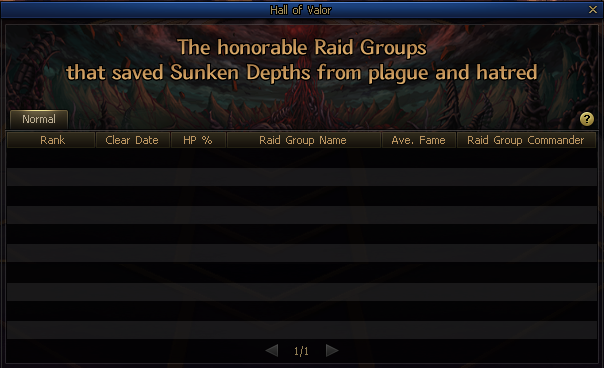
You can use the Hall of Valor feature through NPC Third Adjutant Farrier Calceo in town.
- The Hall of Valor displays the clear records of the top 100 Raid Groups with the fastest clear times each week.
* Raid Groups that cleared at a high HP Ratio setting will be ranked higher.
* If the HP Ratio setting is the same, the raid group with the faster clear time will be ranked higher.
- Hall of Valor will be reset after maintenance.
For the three weeks during which the ranking event is held, the clear records of up to 100 raid groups that cleared first with an HP multiplier of 200% or higher will be displayed. (이벤트 링크)
Delezie Raid (Solo/Matching)
Solo
Clearable by a single player, the content is cleared upon defeating Salgeifer the Heartless.
How to Proceed
At the start of the content, you'll be assigned to a random area within the Fount of Tribulation.
You must defeat the Maleficent of Tribulation and the Named monster guarding the assigned area.
- The Maleficent of Tribulation is guarded by the Named monster.
- Salgeifer the Heartless is protected by the Five Maleficents of Tribulation.
The areas within the Fount of Tribulation, as well as the combinations of the Five Maleficents of Tribulation and the Named Monsters, are the same as in [Delezie: Last Act].
The content is cleared and rewards are awarded upon defeating Salgeifer the Heartless.
Matching
Clearable by up to 12 players (minimum 6) via the Matching system, this content is cleared upon defeating Salgeifer the Heartless.
Party Matching
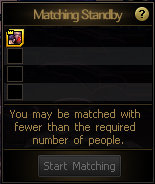
Up to 4 players can form a party and try matching.
Pre-formed parties are kept together when a Raid Group is created through Matching.
In Matching mode, Buffers will be in the same state as in Solo mode.
If the system detects intentional disruption of progress, access to Matching mode will be restricted for a certain amount of time.
How to Proceed
At the start of the content, each party is assigned to a unique area within the Fount of Tribulation.
You must defeat the Maleficent of Tribulation and the Named monster guarding your assigned area.
- The Maleficent of Tribulation is guarded by the Named monster.
- Salgeifer the Heartless is protected by the Five Maleficents of Tribulation.
If your party defeats your assigned Maleficent of Tribulation, then it can fight Salgeifer the Heartless.
- When Salgeifer the Heartless becomes available for combat, his troops will appear to protect him.
- Defeating the troops will decrease the HP of the Maleficent of Tribulation/Salgeifer during battle.
If you don't defeat the Maleficent of Tribulation in your assigned area, then you can't move to another area.
- Once the Maleficents of Tribulation in all areas are defeated, you can move to another area.
The areas within the Fount of Tribulation, as well as the combinations of the Five Maleficents of Tribulation and the Named Monsters, are the same as in [Delezie: Last Act].
The content is cleared and rewards are awarded upon defeating Salgeifer the Heartless.
 Edge
Click the "View Site Information" icon on the left side of the address bar,
Edge
Click the "View Site Information" icon on the left side of the address bar, Firefox
Select "Allow" in the notification window that appears
Firefox
Select "Allow" in the notification window that appears Other browsers
Allow blocked notifications in your browser’s settings.
Other browsers
Allow blocked notifications in your browser’s settings.
.jpg)


.jpg)
.jpg)
.jpg)
.jpg)
.jpg)
.jpg)
.jpg)
.jpg)
.jpg)
.jpg)
.jpg)
.jpg)
.jpg)
.jpg)
.jpg)
.jpg)
.jpg)
.jpg)
.jpg)
.jpg)
.jpg)
.jpg)
.jpg)
.jpg)
.jpg)

.jpg)
.jpg)
.jpg)
.jpg)
.jpg)

.jpg)


.jpg)

.jpg)


.jpg)


.jpg)